This is a question I get a lot, because here in the US at least, we have this slightly mystical culture around the creation of art. It is generally assumed that most artists are naturally talented, the sort of magical genius we all wish we could be at something. There is this idea that artists just KNOW how to create, and their ideas and talent come from some mystical gift from beyond.
Um….No. That's not how it works. I am not sure why this fantasy is so pervasive, but artists are just like anyone else and our skills come from lots and lots of practice, education, and applied learning. At the end of the day painting a mural is just a specific skill. (Which is why the cost what they do)
So a mural always starts with an idea or an image. I know muralists who sketch everything out to scale on paper with pen and paint. I know other artists (like myself) who design everything digitally. In either case, we are developing what the final mural will look like, but we are doing it at a manageable scale so that we can play with ideas, make mistakes, and try out different solutions. There are some brave artists who have an approach that lets them work and play directly on the wall, creating a more free form experimental image, so this definitely happens too, but the majority of murals you will see were designed in the studio beforehand and then scaled up to fit a big wall.

I think this next step is where the mystery lies. How do we get this small image up on a 50 foot wall? What happens if we make a mistake? Well, first off, we DO make mistakes, but paint is forgiving and if we get back down to the ground and see that something is wrong, we paint over it and try again. It’s pretty embarrassing to have a huge mistake visible to the whole street for a while, but that's the worst that happens and no one is the worse for wear. But to help make less mistakes, we have some tools we use to get the image on the wall at the size and scale we need.
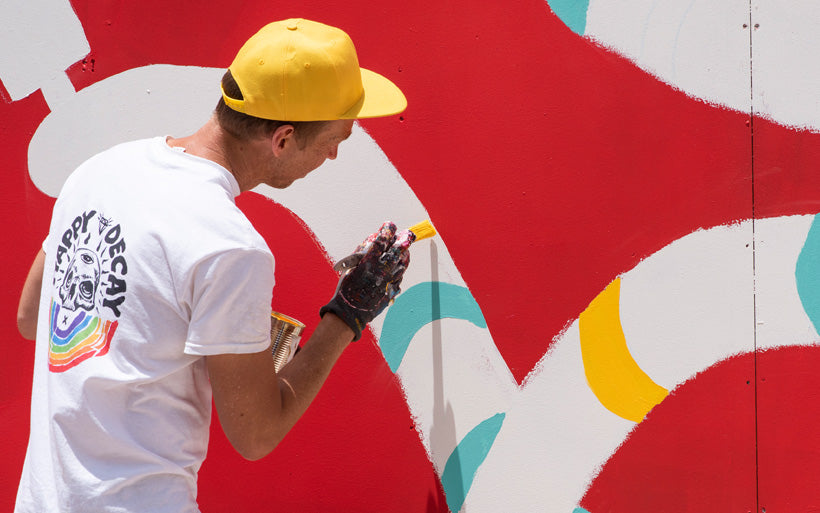
- Freehanding- these artists really are geniuses and their skill level is prodigious. They put art on the wall exactly as you would imagine, by knowing their design and source image so well that they can just draw or paint it onto the wall with the correct size and proportions. They will often sketch the image on to the wall first and use those marks as a guide to adjust as needed. This gets progressively more difficult as the wall gets larger, but there are some muralists who can do whole buildings this way. They are inarguably talented people- but keep in mind that they also spent many, many years honing those skills. You can see Melbourne artist HAPPY DECAY/Bjarni Wark freehand painting here.
- Grid or Doodle method- these are similar methods that use a guide to get the image on to the wall. For the Grid Method, artists will create a grid on the wall, and then match that grid to the picture so that it breaks down the image and wall into manageable pieces. Knowing what to put in each square and how the squares fit together provides a frame of reference. This is particularly useful for hyper realistic images. Creating a grid is not always practical however, and some walls don’t lend themselves well to that sort of rigid control. So for those walls artists use the Doodle Method, which is exactly what it sounds like. Artists will doodle letters, shapes, numbers, squiggles etc all over the wall. These are especially fun to watch go up because they will be painted over, so you get to see whatever random bits are floating around the artist’s mind. Once the wall is covered in doodles, the doodles are superimposed over the image so that the artist can see what parts of the image are close to specific doodles. Like the grid, they provide a frame of reference and a way to make sure the right parts of the image are on the right parts of the wall. Both of these methods are especially helpful with really huge walls where the artist is using a lift and sketching freehand becomes really difficult. Below is Seattle artist Jen Vickers creating her doodle.

- Projector method- This approach gets a lot of shade from other artists who say that it’s not really creating art if you need to use technology to do it. Personally I think that view is ableist and elitist, because everyone comes to the art world with different sets of skills, privileges and setbacks. Just because you haven’t had the privilege to hone a specific set of skills does not mean that the ideas are less relevant or the image less compelling. I also think it’s sad when artists rag on each other for using different tech, because no one gains anything from that conversation. ANYWAY- the projector method is simply using a projector to get the image on the wall and then tracing the lines and shapes. This is really useful for projects that need to be done quickly, for complicated designs, or for when a big team is installing a mural and everyone needs to be on the same page. I use projectors when I am working with students, when I have multiple assistants, when I need to get a job done at speed, and when I am painting an image outside of my skill set. For example, I am really good at painting birds and flowers, but not so great at painting crisp geometric images. So I use a projector when I need those straight lines and exact proportions. This is me and my assistant, artist PUBS/Nathan Burnham-Bradley using a projector down in Tacoma for the mural I did at the Tacoma Community College library.

After the image has been designed and sketched onto the wall, painting can start. This is the piece most people think of when they think of creating a mural, the application of color. And they’re right- this is the fun part, where the image comes to life. But as you can see, a lot of work and prep went into deciding the image and then getting it onto the wall. For most artists this is the easy part, where the image comes to life and they can play with their use of color and technique. It is where you will see an artist's style come through and the image come together. The last steps after this are cleaning up and signing the finished piece.
Now that you know what goes into the process of painting a mural, have a look next time you see one and notice if you can tell how it went up!